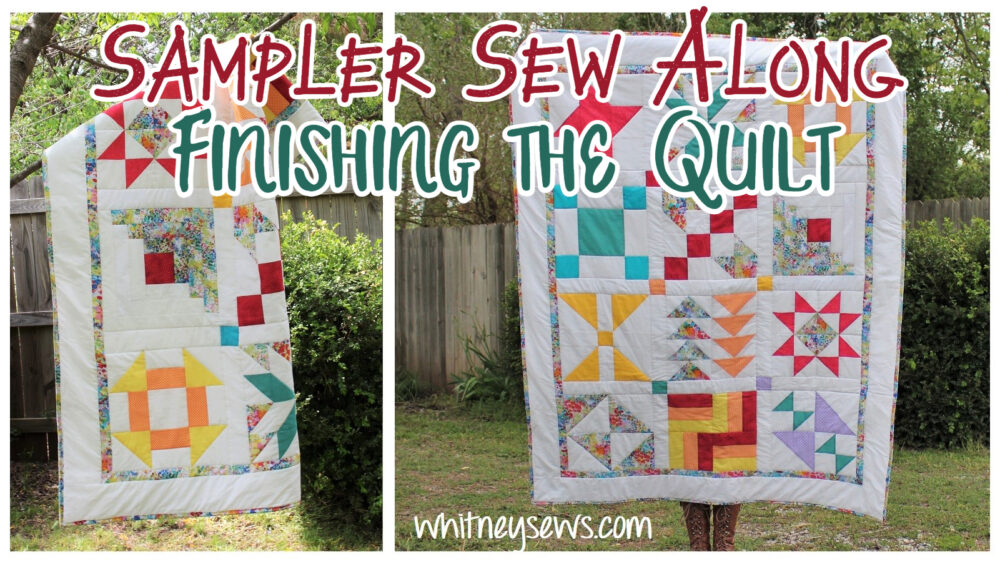
Three years ago I started my Sampler Sew Along series. Throughout the series I shared tutorials for 12 different historical quilt blocks and today I’m going to talk about finishing the sampler quilt. You can find the playlist with each tutorial HERE.
If you’re unfamiliar with sampler quilts, they became popular in the 1840s when block style quilts were still fairly new. Typical quilts repeat one or two blocks over and over to create an overall design, but sampler quilts are a combination of several different quilt blocks with no real correlation to them. The quilts were often a way to practice or experiment with different types of blocks. Other times friends or quilting guild members would make blocks separately and combine them later to make a quilt.
But back to this quilt, or rather the 12 quilt blocks. The blocks measure 12.5 inches square as is and will be 12 inches square when sewn into the finished quilt. You can sew the blocks directly together and have a finished quilt top measuring 36 X 48 inches. Then add a backing and batting, sew some quilting, trim and bind and you have a beautiful sampler style baby quilt.
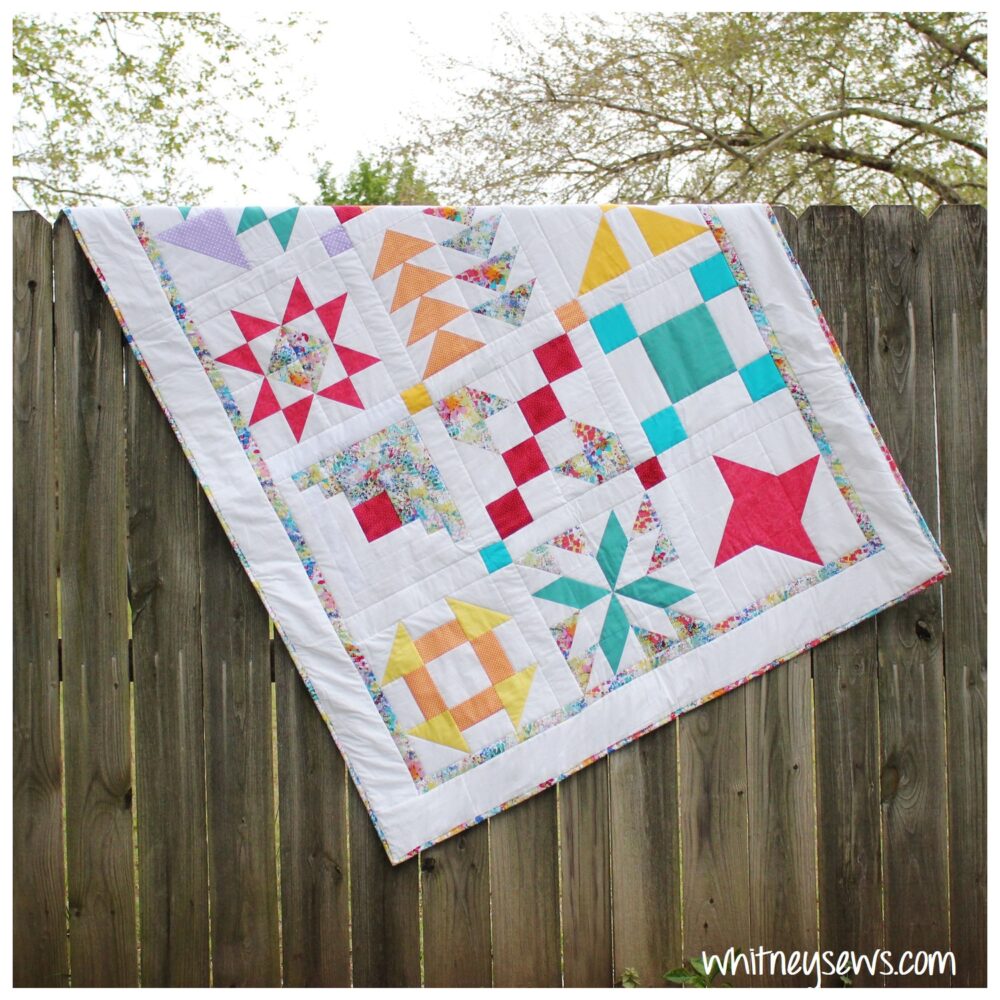
Or you can add other elements to make your quilt larger. My quilt includes sashing, cornerstones, and borders so it measures 50 X 64 inches – a good lap quilt or throw quilt size.
You can finish your quilt however you want, but if you want to make yours similar to mine I will have the measurements of each piece listed below as well as the notes my mom wrote down while she was finishing the quilt. Yep, you read that right, I asked my mom to help me after I had sewn the individual blocks. She’s better at finishing quilts than I am and had more time to work on it. Huge thanks to my Mom!
In my video HERE I go over what cornerstones, sashing, and borders are along with LOTS of other details about this quilt. You will need to know what each of those terms mean for any of the information below to make sense.
The cornerstones were cut from six different fabrics to a size of 2.5 x 2.5 inches. They will measure 2 inches square in the finished quilt. The sashing is 2.5 inches wide cut and finishes 2 inches wide in the finished quilt. The sashing was cut 2.5 inch wide by the width of the bolt of fabric then cut down into 12.5 inch lengths. It took three width of fabric strips to create the seventeen sashing pieces in my quilt.
With the blocks laid out in their final layout, one sashing piece was sewn to bottom of nine of the blocks (each block in the top three rows). Then a cornerstone was sewn to six of the remaining sashing pieces. Those units were then sewn to the right side of the blocks (excluding the three blocks on the far right of the quilt). The last two sashing pieces were sewn between the blocks in the bottom row. After all the sashing and cornerstones were attached the larger block units were pieced together.
Then the borders were added on to the outer edges. The skinny, multicolored border was cut to 1.5 inches by the width of fabric and finishes 1 inch wide. I believe it took 5 strips to make up the border. One strip for each short end and one and a half strips (pieced together) for each long side. And finally, the white border cut to 4.5 inches, finishing 4 inches wide. I’m not sure how many strips that one took – it’s not in mom’s notes.
After the entire quilt top is together it needs a backing, batting, quilting and binding. I talk more about this in the video HERE. The batting in my quilt is a warm and bright polyester batting that can have up to 10 inches between quilting lines. My mom quilted it using a stitch in the ditch method. This is where quilting lines are sewn following the piecing lines of the quilt blocks. My quilt will be displayed on my quilt ladder and not used or washed often so it doesn’t need a lot of dense quilting. Feel free to quilt yours however you like!
And finally, trim up all the edges and add a binding. I have a step by step binding tutorial HERE. Then step back and admire your beautiful quilt!
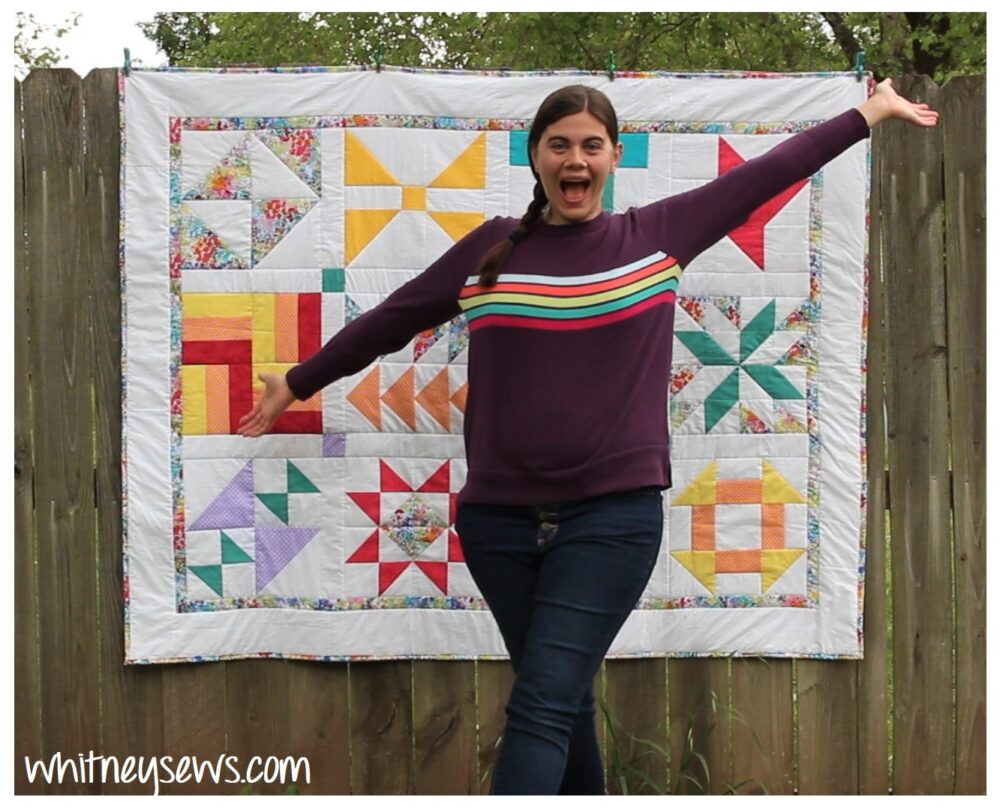
I LOVE how my quilt turned out and can’t wait to see everyone else’s finished quilts! Please share pics of your blocks and quilts with #SamperSewAlong and don’t forget to tag me. Until next time, Happy Sewing!
Whitney
