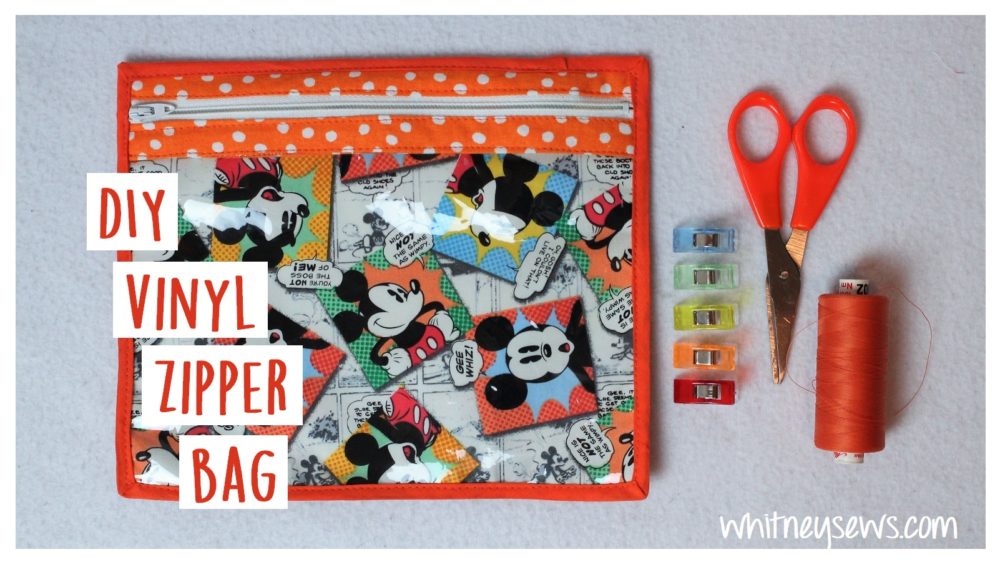
 Last week I got sick…Bleh! It was the kind of sick that leaves you with 0 energy. I spent 2 days straight in bed, exhausted and coughing. While I was in bed I had plenty of time to think about sewing (since I couldn’t actually sew). I came up with a really unique bag project that I hope to share in the next few weeks and as soon as I was well enough to sew I filmed this week’s tutorial. It is a zipper bag featuring a vinyl window in the front so you can see exactly what is inside the bag. The vinyl zipper bag is fully finished inside and out so it will last a very long time.
Years ago I picked up a remnant of vinyl fabric. For a very long time I was too intimidated to sew with it. I hated using vinyl because it sticks to my machine, slides around while I’m sewing, and never seems to end up how I want it. But I realized I will never get better at working with vinyl if I don’t actually use it!
 I guess what I’m saying is I am by no means an expert when it comes to sewing vinyl. I struggle just as much as anyone else, but this tutorial is about the project…which is a really great zipper bag! My cheat for making sure the bag turns out, despite any sewing struggles, is to cut the vinyl larger than the desired finished size. Then I trim it down to size before adding the binding in the last step.
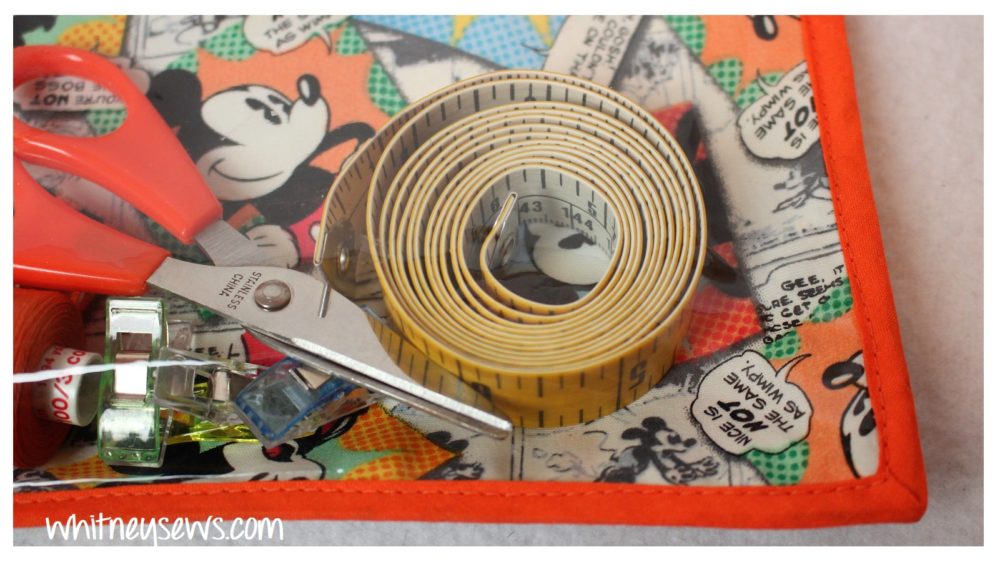
The one tip I do have to share pertains to cutting the vinyl. I’ve tried cutting it with a gridded acrylic ruler and a rotary cutter, but it is too hard to see the vinyl under the ruler and make sure I’m cutting it to the exact right size. So instead I use a permanent marker to mark out the lines I need to cut on. Then I can see I have the measurements right and the lines are easy to see under the ruler as I cut with a rotary cutter. You can find my favorite rulers and rotary cutter HERE on my Amazon page. Anything purchased through that link helps me earn a small percentage to fund future Whitney Sews tutorials.
Anyway, let’s get on with the actually tutorial. As I mentioned earlier, I was just getting over being sick and ended up cutting one of my pieces the wrong size. I realized it way too late to recut it, but thankfully I have copied all the measurements down CORRECTLY for you all!
 After your pieces are cut you are ready to start sewing! Follow the step by step tutorial HERE!
I would love to know if you like working with vinyl or if you’re like me and still need a lot of practice. If you make this or any other project using my tutorials I would love for you to share a pic on the Whitney Sews Facebook page or on instagram using #WhitneySews
I’ll be back next week with another new tutorial! Until then, Happy Sewing!
-Whitney-