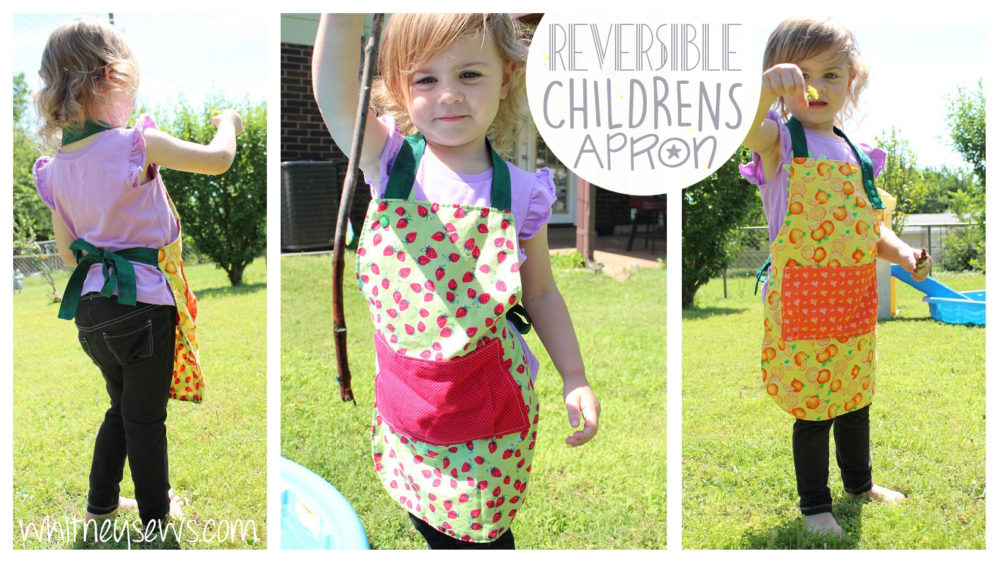
Last week’s how to was all about my daughter Skyler. So this week I have a project just perfect for Peyton! I started wearing aprons a couple of months ago when cooking and cleaning and Peyton took an interest in them. So I wanted to make a special apron just for her.
If you know toddlers you know they LOVE pockets! So I made sure to not only include a pocket on each side (did I mention the apron is reversible?!?), but also give the pockets some dimension with pleats in the bottom so it is easier to take things in and out. I also made sure the neck strap is easy to adjust so it can grow with Peyton.
I made my apron from several fabrics from my stash, but you can make the entire project using as few as 4 fat quarters.
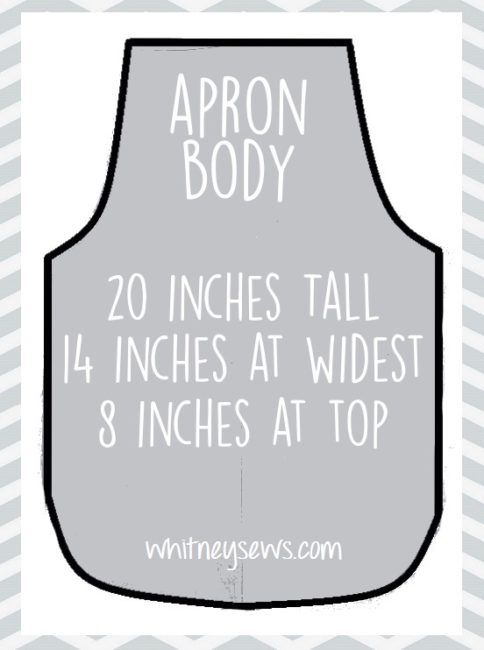
You will need to start by drawing out your apron pattern. Below is a graphic showing the pattern shape and dimensions. It’s easiest to mark a center line, the top edge and bottom, and the straight sides. Then free hand the curved areas on one side. Fold the pattern along the vertical center line and cut through both layers of paper at once to make your pattern symmetrical.
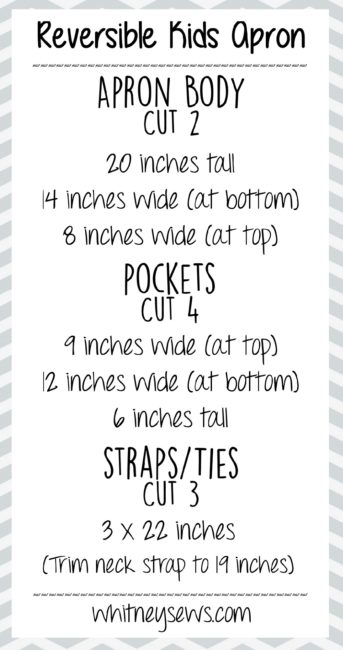
Once you’ve created your pattern cut out all of the pieces listed below.
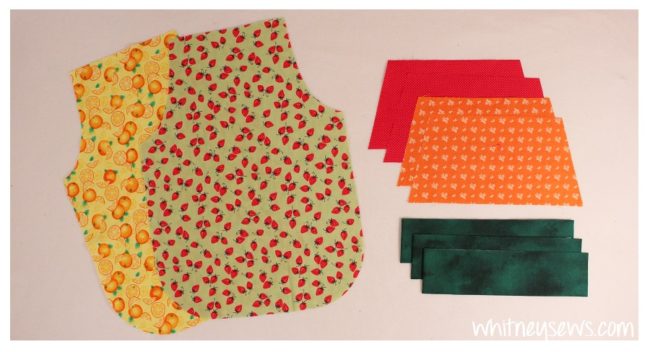
Once you have all the pieces shown here and you are ready to start sewing!
Follow along with my step-by-step video tutorial to put your apron together. Click HERE to watch!
You can use a button and button hole for the closure on the neck strap, but I wanted to use snaps for mine. I use THIS snap setting kit.
Snaps are easy to install and use. If you don’t know how to install a snap, click HERE to learn how.
I didn’t mention in the snap video, but if you are installing a snap through a couple of layers of thin material the snap post can sometimes end up taking up too make space in the female side of the snap after it’s set. This is because there wasn’t enough thickness of the materials to use up that length of the post. This can keep the male side from having enough room to fit inside and securely snap in place. You can remedy this by cutting the tiniest bit off the end of the post before installing the snap.
If you give this or any other of my tutorials a try please share a pic with me on the Whitney Sews facebook page or on Instagram with #WhitneySews.
Come back next week to learn how I made 2 cute gathered skirts out of one curtain! Until then, Happy Sewing!
-Whitney-


