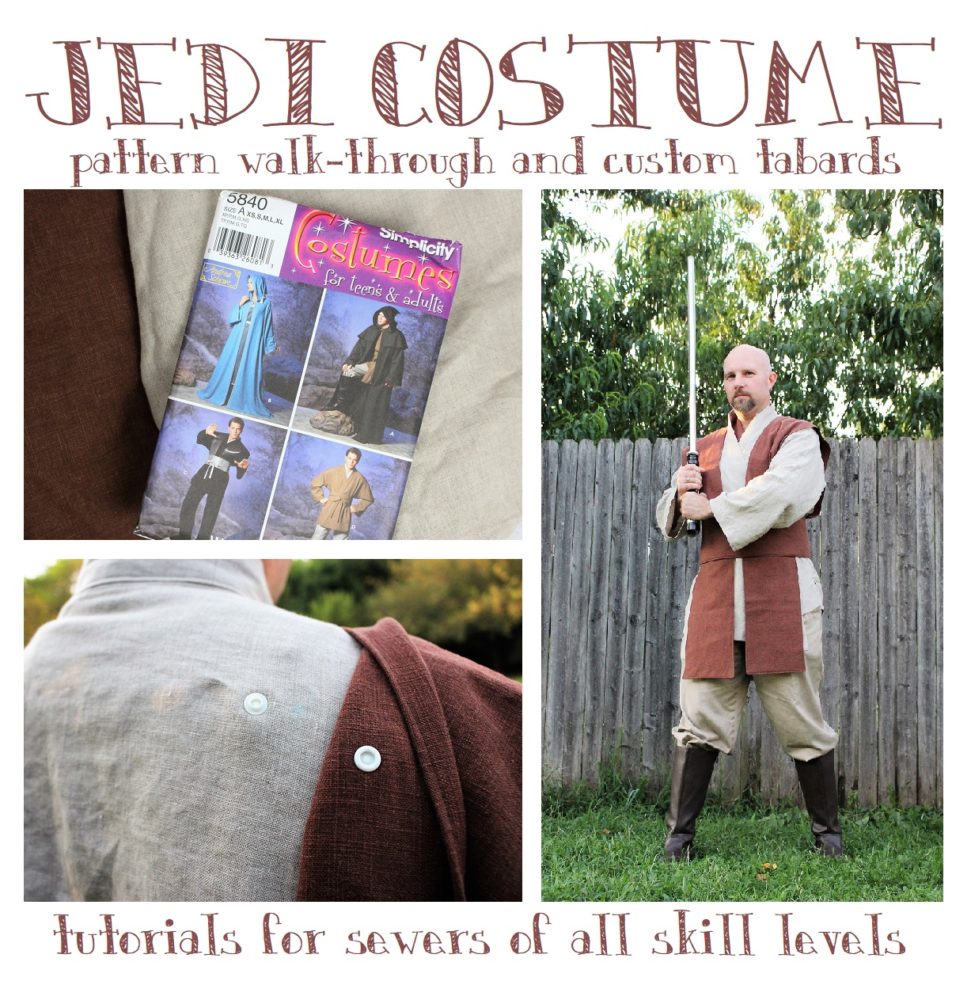
It’s time for part two of my Jedi costume series! Today I’m sharing how to make your own custom tabards and obi with hidden snaps to make sure everything stays perfectly in place!
As I mentioned in Wednesday’s post with the tunic pattern walk-through I have made three jedi costumes thus far. The first was for Jeremiah using super cheap cotton fabric we had on hand. We brainstormed together and figured out the design we wanted for the tabards and obi (because the option that comes with Simplicity 5840 is terrible). We took measurements, looked at various photos, wrapped scraps of fabric around Jeremiah until we decided we had some numbers that seemed right.
Over the years when Jeremiah wore the costume I would notice the tabards slipping off the shoulders – more and more the longer it was worn. So when I made my own costume I knew I needed to have a solution for the tabards. I didn’t want to spend my entire time in costume adjusting the layers. I decided snaps were the solution, but I did NOT want them to be visible! They worked out perfectly and I’ll be sharing all my tips and info in the tutorial.
Of course before starting anything you will need to figure out your measurements. Not your actual waist, hip, etc size, but the sizes you want your tabards and obi to be. It’s easiest to use some string (because a tape measure won’t be long enough) and a friend. While looking in a mirror, drape the string over your shoulder and decide how long you want the tabards to be. Jeremiah likes his to be mid-thigh, but I prefer mine approximately the length of my tunic. Mark that length on the string and measure it (you may need to fold it in half so it’s easier to measure). Then add 1 inch for seam allowance.
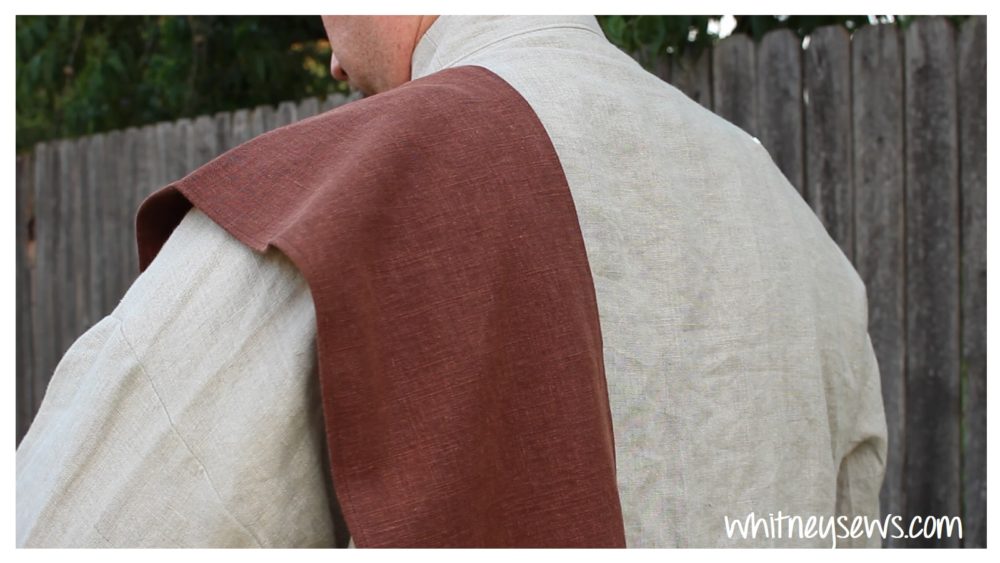
The width can be done with a tape measure of if you need a better visual try folding an extra piece of fabric until you like how much of your should it covers. Measure the width, multiply it by two so you have enough for the front and back, then add one inch for seam allowances.
And finally, onto the obi.
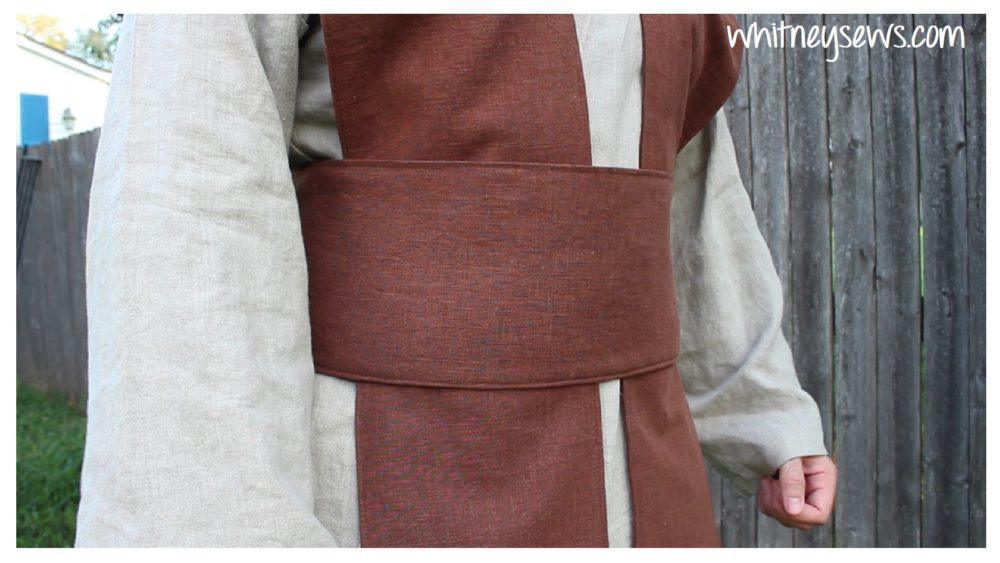
Wrap the same fabric, scarf, or whatever you have on hand around your waist (this can be your natural waist like mine or a little lower – whichever you prefer to wear yours at) until you like the width. If you have a more curvy shape like mine you should consider going with a more narrow width for a better fit since there isn’t any darts or shaping. Jeremiah can go with a much wider width because his waist and hips are fairly close in size. After you decide on a width multiply it by two to account for the lining and add one inch for seam allowance. The length is your waist measurement (where you will wear it) plus 4-5 inches for overlap and one inch for seam allowances.
The finial thing to cut is the fusible fleece. Cut one piece (or two if one isn’t long enough) the width you want your obi to finish and the length of your obi minus half an inch.
Watch my step by step tutorial HERE to learn how to make your tabards and obi. I cover everything from cutting them out with the least fabric waste, adding hidden snaps, and nicely finishing everything.
I also wanted to mention an awesome event our Star Wars group, JediOKC, has coming up soon. Each year we raise $15,000 to buy a new coat and a new pair of shoes for all the kids in the local mental health hospital. This year to help raise some of the funds we are hosting a 5K Masquerade 5K! It is going to be a TON of fun! You can read more about it in the image below. There is even a virtual run option for those who want to participate but can’t be there in person! I hope you will check out the website and consider signing up!
Check out the site HERE!

Whew! Not going to lie, this week has been crazy! Putting out two huge videos like this has left me up late editing every single night this week, but I hope the tutorials are helpful for at least one person. I’ll have another new video up on Wednesday, until then, Happy Sewing!
-Whitney-