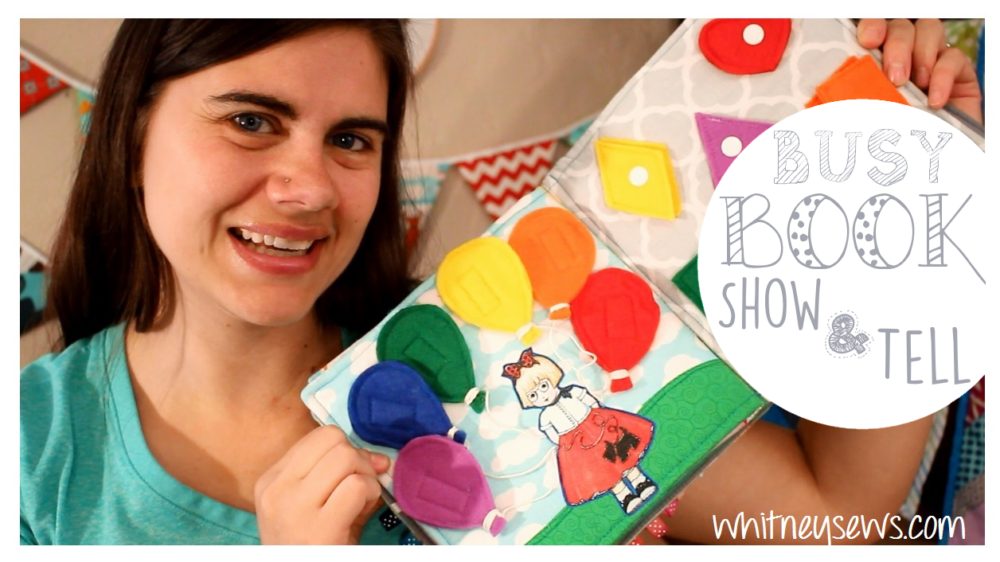

It’s finally finished!! I started making a busy book long before I even had kids and now that my daughter is 2 I finally finished it! It was a lot of work, but I’m so happy with how the entire book turned out.
I show off every single page and detail in the video HERE!
Below is a chart full of measurements and info to use if you want to create your own busy book.
Want to learn how to make the cover?? Watch the full tutorial HERE!
If you want to make a busy book the same size as mine use the measurements listed below:
Cover and Inside of Cover - 9 x 9 1/2 inches (working space 8 x 8 1/2)
Pages 1/8 & 2/7 - 9 x 9 1/4 inches (working space 8 x 8 1/4)
Pages 3/6 & 4/5 - 9 x 9 inches (working space 8 x 8)
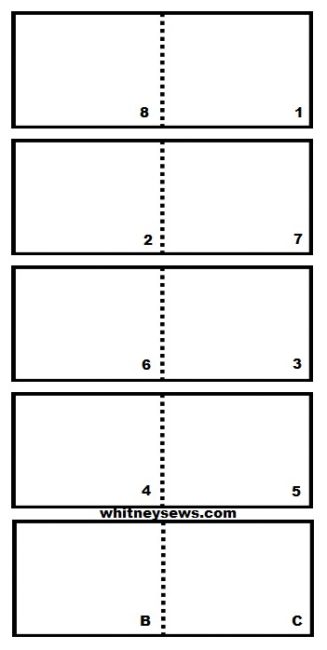
The pages have to be sewn together in a specific order so they are on the right sides. The chart shows those layouts.
Use a 1/2 inch seam allowance to attach the pages in pairs. Then add a layer of fusible fleece (here’s the one I recommend)
Pair up your page spreads according to the sets shown above (Ex. 1/8 & 2/7) and place them right sides together. Sew around the outer edges to attach leaving a few inches open to turn through. Turn right sides out and top stitch all the way around.
Sew the first set to the cover with two straight lines of stitching about 1/4 inch to either side of the center line. Then add the center page spread on top and sew a line down the center to attach. Be very careful because you will be sewing through a LOT of layers!
I hope you enjoyed seeing my completed busy book and gained some inspiration for your own! Until next time, Happy Sewing!
-Whitney-


What a wonderfully fun book for little ones..I absolutely love it. I remember buying a Dapper Dan doll for one of my kids back in the 60’s or early 70’s. It had zipper, buckles, buttons, pockets,shoe laces to tie…so many fun learning things for little ones.
Thanks so much Whitney!
Comments are closed.