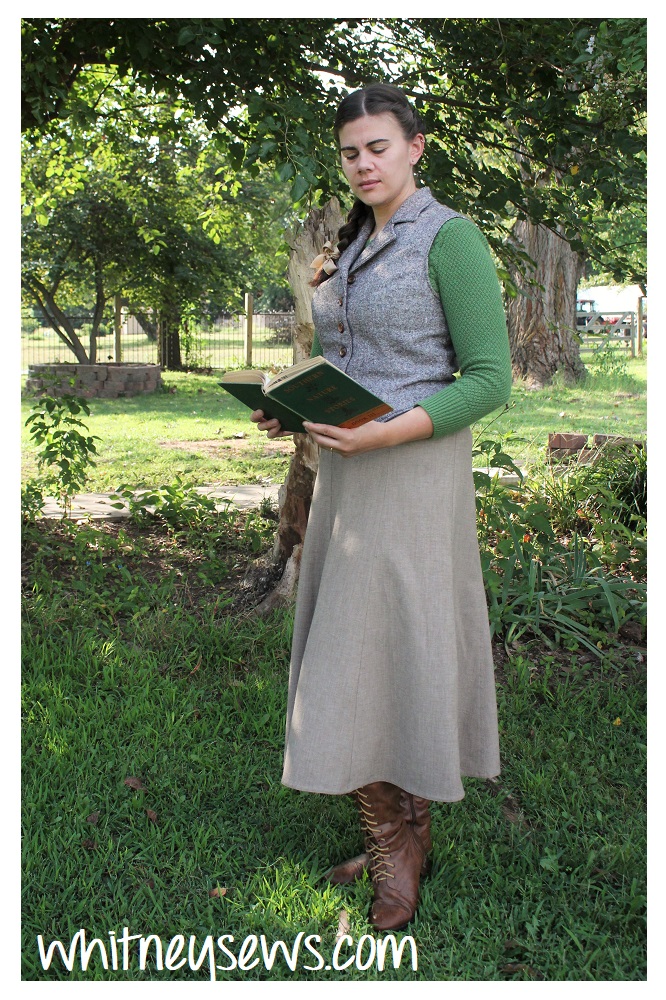
It’s a little funny for me to say out with the old about anything. I tend to embrace old things – old sewing machines, old (style) clothing, old books, old technology (until I’m absolutely forced to update), etc. But in this case it truly was time to be done with the old. The old I’m referring to is actually THIS website.
I was using hosting that was beyond out of date and it was causing all sorts of problems with my site. I had to make all the listings in my shop FREE a few months ago because my plugins (including the one my shop is through) were out of date and no longer communicating with paypal. If I updated the plugins my entire site would crash, so cutting paypal out of the equation was the short term fix. Two months ago my daily backup and a few other features quite working. I wasn’t able to post anything new without risking a crash. So it’s been two quite months here on WhitneySews.com.
But, I’m VERY HAPPY to announce that my site is now up to date! A lot of money and many phone calls later things are up and running as they should! Hopefully you won’t even notice much of a change other than smoother, faster loading and the little lock symbol on the address bar showing my site is safe and secure. Over the next few weeks/months I hope to make a few more updates and changes that will continue to improve the function of the site.
Now that you’ve read all that boring website stuff, I wanted to share some of the things you may have missed while I was unable to post here on my site.
First up is my Instagram page. I have been challenging myself to share beautiful, curated photos showing off my handmade projects and thrifted style. My long term goal on Instagram is to reach 10,000 followers. That is when Instagram allows links to be included in stories which would make promoting new videos and linking to favorite supplies a lot easier. If you aren’t following me in Instagram I would love for you to click HERE and give me a follow!
So, what I’ve been up to…during October I had the idea to recreate the Urban Outfitters ghost pillow.

It is adorable and super easy to DIY. I made my version using only items left from other projects. The faux sherpa was a thrifted pullover I had used to make a costume for Skyler and one sleeve of the original shirt was left over. The backing fleece was a scrap left from my Totoro Kigurumi. The black felt came from making the girls’ poodle skirt costumes. Even the stuffing was left over from my days of making custom memory bears.
You can watch my ghost pillow video HERE and see just how easy and cute it is!
After that I jumped right into another project that uses only repurposed materials. My youngest daughter had a cute cat shirt she loved, but it was way to short for her to keep wearing. I knew I had to come up with a way to refashion it for her. I had pinafores on the brain, so that’s the direction I went.
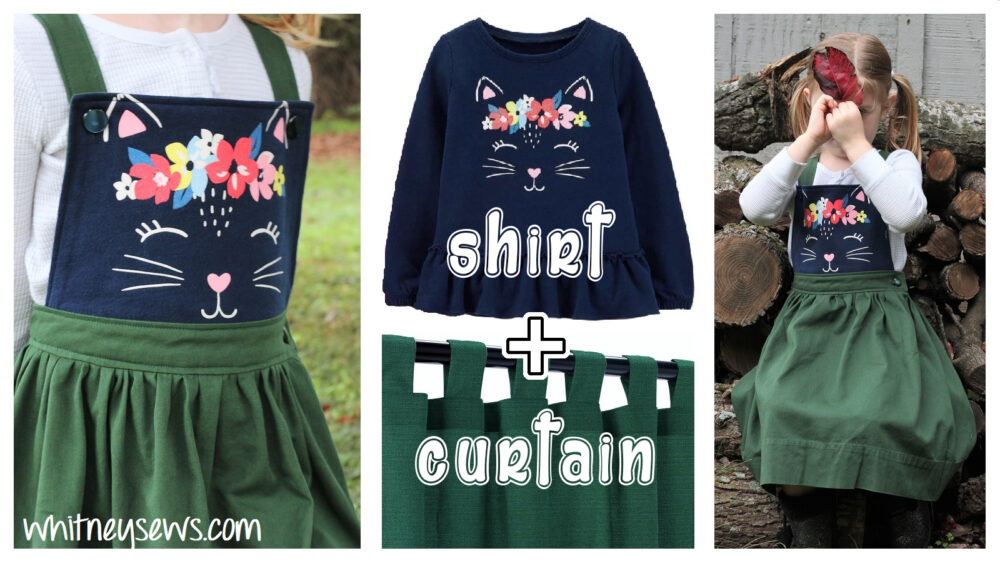
I used her shirt and a thrifted curtain to make an ADORABLE pinafore dress! The dress turned out EXACTLY how I wanted and Skyler is so happy with it and wears it often. You can watch the making of vlog HERE!
In the video I talk about the idea of make do and mend which was a phrase that really represented the WWII era. Because of textile shortages people were forced to make do with what they had and find ways to mend or repurpose things to work as long as possible. We obviously do NOT have a textile shortage in this day and age, we have the opposite problem! There are so many cheap and cheaply made clothes available and when they fall apart it’s easier to toss or donate and buy more cheap clothes than to repurpose or mend them.
I decided to challenge myself to make do and mend what I own. Does that mean I’m never going to buy new clothing or fabric ever again?? No. But before running to the store to buy something new I’m going to take an honest look at what I have. Is there something I already own that can be repaired or mended? Can I repurpose another item into something new? Could I find what I need at a second hand store? If all of those answers are no that is when I will invest in a new item.
So when I got the idea to make a hooded neck warmer (a variation of my original neck warmer tutorial) I began to think of ways to use what I already had. Six years ago I worked at a thrift store and while I was there I thrifted some faux fur fabric. I had some left in my stash. I also had a cozy hounds tooth fabric I thrifted a several months back. I put the two fabrics next to each other and they looked good together so that’s what I used. The hooded neck warmer turned out really great and I don’t think I could have picked fabrics at the store that worked together so perfectly!
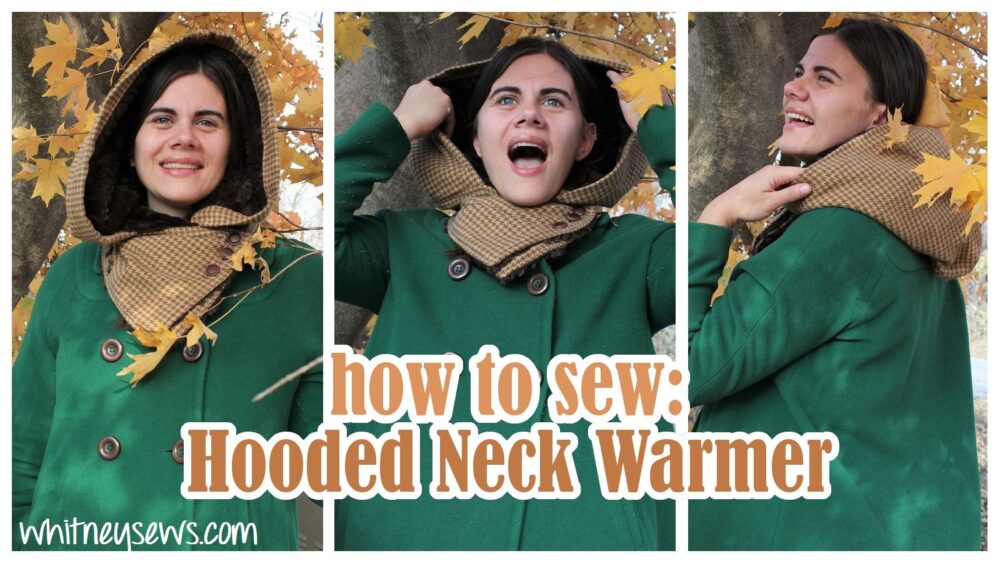
You can watch the hooded neck warmer tutorial HERE and learn how to make your own!
Wow, that was a lot to share! I hope you enjoyed hearing my updates and will check out any of the videos you may have missed. I pray that you are all doing well and staying safe! Until next time, Happy Sewing!
Whitney