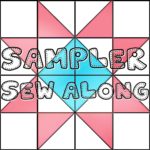
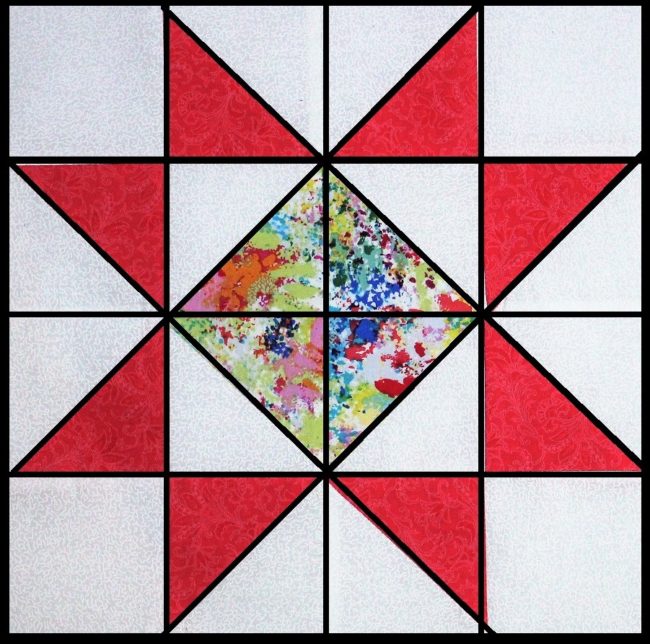
It’s time for the ninth block tutorial in the Whitney Sews Sampler Sew Along! Haven’t heard about it yet?!? Each month I’ll be sharing a step by step tutorial to make a traditional quilt block as well as how to sew the blocks together to create a sampler style quilt that finishes in a great lap quilt/baby quilt size. This week I’m sharing a tutorial for the Crystal Star block. This one dates back to 1934.
I share the step-by-step instructions for sewing the Crosses and Losses block HERE!
Don’t forget to share a pic of your finished block with #SamplerSewAlong so we all see it!
I hope you are enjoying the quilt-a-long as much as I am! Until next time, Happy Sewing!
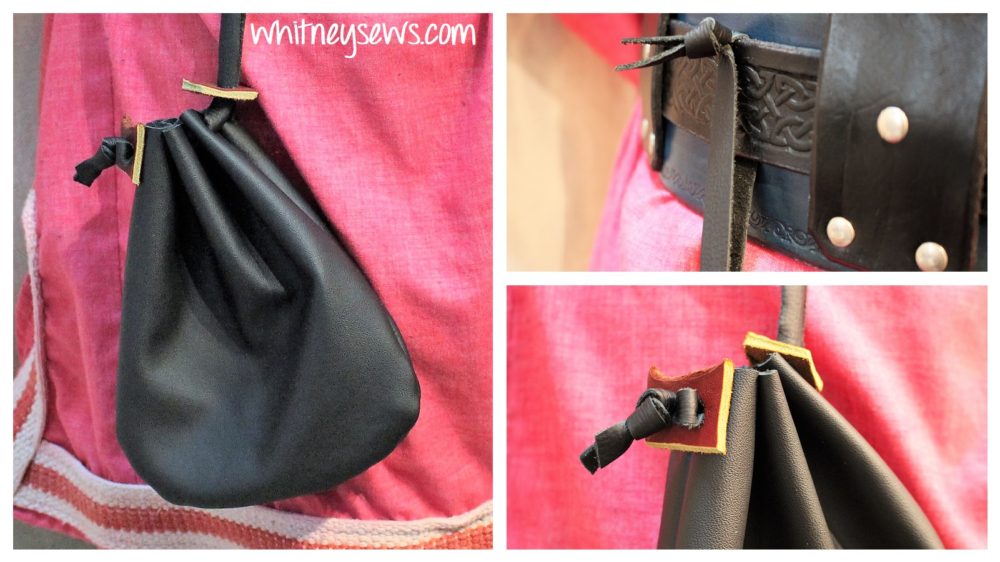
On of our favorite yearly traditions is to attend the local Medieval Faire in the Spring. We have gone together as a family for the past nine years. Each year we come home from a weekend of fun inspired to create many new projects. One of the first projects I dove into making was a drawstring leather pouch.
Any time we dress up in costumes (which is ANY time there is a reason) we are trying to figure out where to keep a phone, chapstick, or keys. These simple leather pouches solve that problem for our Medieval/Viking inspired costumes. They aren’t 100% historically accurate, but neither is the rest of our costumes 😉
I dug through my leather stash (and what a large stash it is!) and found several different kinds of leather, only a couple of which will work for a bag in this style. Before the sewing tutorial actually starts I share several different leathers to give an example of how they look and feel so anyone making a bag can find the right kind of leather.
Another factor in selecting your material will be size. I made a basic pattern for my bag that measures 8 inches wide and 8 1/4 inches long with the bottom two edges slightly rounded to give the pouch a nice round bottom. Two pieces will need to be cut from that pattern along with two strips of leather 3/8 inch by about 18 inches long. But feel free to make the bag in any shape/size you like. There is only one seam to sew in the entire bag making it a perfect first project for anyone new to sewing leather.
Ok, enough chit chat – click HERE to watch the entire tutorial!
There you have it! A super simple project with lots of costume (and non costuming) uses. I hope you enjoyed the tutorial and until next time, Happy Sewing!
Well, this is not a story I ever expected to be sharing, but I ended up in the ER two weekends ago because I cut off part of my finger! Since it was a sewing related incident and something that will be noticeable in future videos, I thought it was fitting to share. I tell the entire story from the start in my video HERE!
It’s time again for another Sew Your Stash update! Today I’ll be sharing the progress I’ve made toward using my fabric stash over the past few months. If you aren’t familiar with the Whitney Sews Sew Your Stash Challenge you can find out more about it HERE! It’s a challenge I set for myself to focus on using the fabrics and supplies from my stash before buying new. I extended the challenge to anyone else who has their own fabrics stash and wants to join in. I have lots of projects to share today so let’s get started!
I focused on sewing a lot of things for my kids and projects that will help us keep our house/toys more organized. I realized I have a lot of fabrics that my kids would enjoy, so I’m trying to come up with useful items to make with them. You can see everything I made HERE!
What is your favorite item shown in the video? I would love to know!
BTW do you do any online shopping!? Did you know you can use that shopping to help support the Whitney Sews content you enjoy?!?
If you are shopping through Amazon I would love for you to use my Amazon referral link. By clicking the link first (then continue to shop on Amazon as normal) Amazon knows I referred you and sends me a small percentage. That money goes right back into creating high quality sewing tutorials for you to enjoy!
Another easy way to support Whitney Sews is through Ebates (and save yourself money at the same time!). Ebates allows you to save money by shopping online on different sites from etsy to walmart as well as booking travel reservations online (we saved a ton on our last Branson trip by booking through Ebates) and much more. If you haven’t signed up for Ebates and want to try it out please consider using my referral link. By using my link and making a qualifying purchase I earn a bonus for referring you and that goes right back to creating sewing content for you.
I greatly appreciate your support in any form, from using my referral links to sharing my videos with your friends!
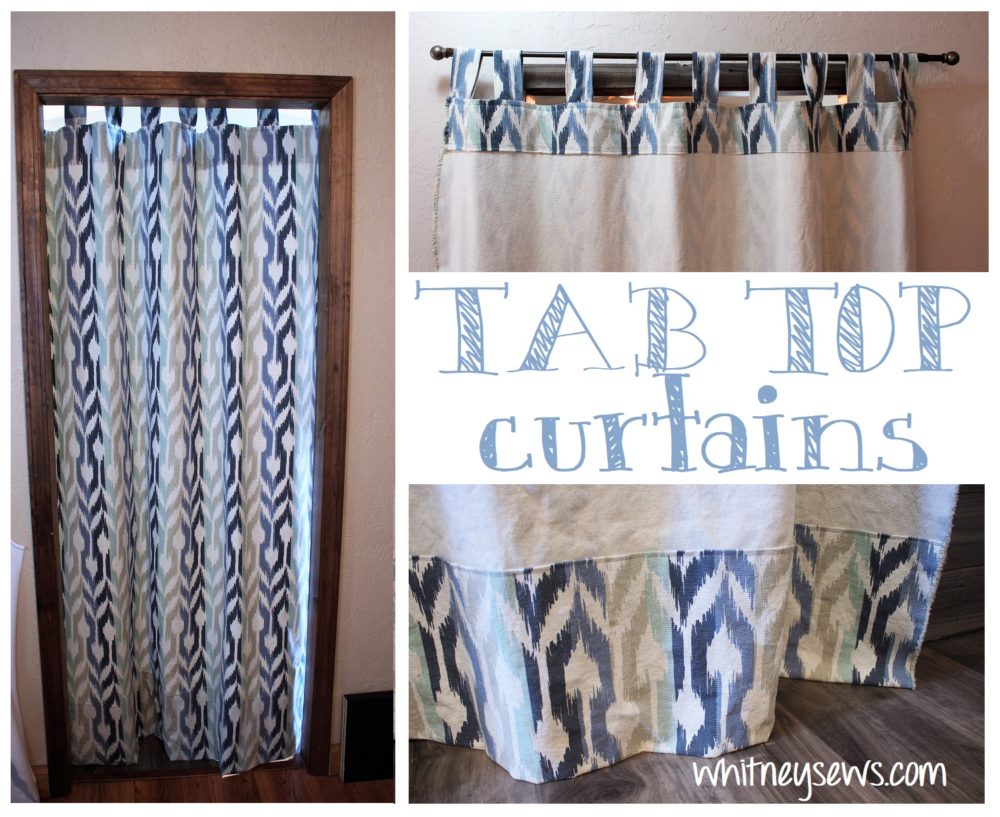
Since we bought our new house at the end of January we have been needing a curtain to separate the master bedroom and bathroom. There is a doorway, but no door as I showed in our empty house tour. We have had the curtain rod up for two months, but no curtain. I finally found a fabric I liked (and for a great price!) and made us a custom tab top curtain. I wanted the curtain to look great from the front and back since it will be seen from both sides. So today I’ll be showing how to make a tab top curtain.
The secret to having a nicely finished curtain is the facing. It’s a strip of fabric at the top of the back that hides away all the raw edges of the tabs. I also left the selvage edges on both sides because I like how they look and it keeps the reverse side from look too much like the “wrong” side.
I cut the facing at 5 inches by the width of the fabric and each tab to 6 inches by 11 inches. I left the remaining yardage whole so the curtain could be trimmed and hemmed after the tabs were sewn on and it was hung up. I loved making the curtain this way because it can be very difficult to cut a large piece of fabric to just the right length.
You can see just how easy this curtain is to make in my step by step tutorial HERE!
I have several more curtains to make for our house and plan on making many of them this same way. Let me know what kinds of home decor projects you would like to see here on Whitney Sews. Until next time, Happy Sewing!
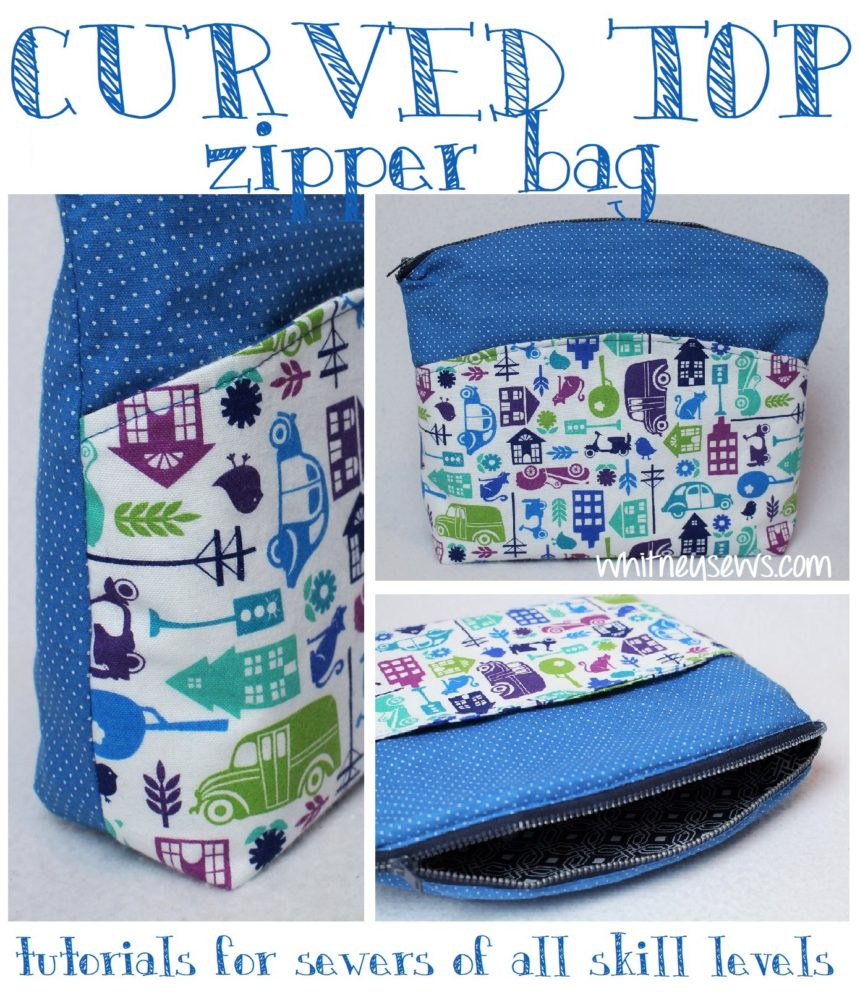
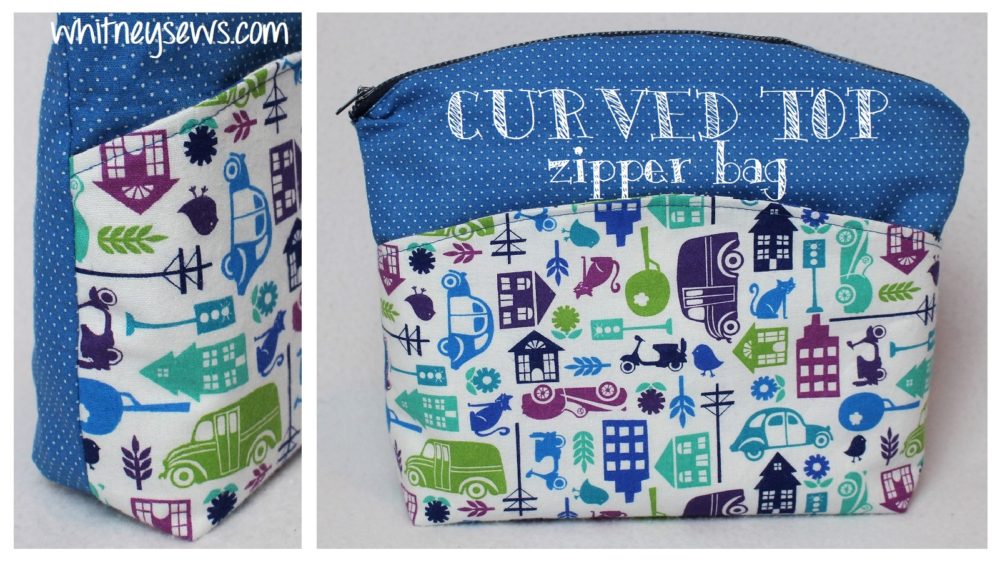
I was scrolling through Instagram a while back and saw a zipper bag that had a curved top and what I thought to be a curved front pocket. I realized later it was not actually a front pocket, but was in fact just a decorative seam mimicking the top curve. Afterwards I was determined to make the bag I thought I had seen in the photo – with a curved top zipper and a front pocket with a matching curve. I had never made a zipper bag with a curved top, so this was a fun project to design and make.
Before starting your curved top zipper bag you will need to make a pattern. I made a quick pattern to test the design, assuming I would need to tweek the pattern and I would film making the new one. Buuuuut the original pattern worked out and I didn’t need to make a new one. But it’s not hard at all, so I’ll walk you through it.
Grab two pieces of 8.5 x 11 inch printer paper. Trim a quarter inch off each so they are 8.5 x 10.75 inches. On one sheet measure up 1.5 inches from the bottom (long) edge and draw a gradual curve from the bottom to the mark 1.5 inches up. Fold the paper in half and cut along the marked curve to make sure the curve is symmetrical. Tape the curved piece to the top edge of the larger piece (making it about 10 inches tall at the highest and still the 10.75 inches wide) and you have your pattern.
Use the pattern to cut two bag outers and two bag linings. Then fold the bottom two inches of the pattern up so the shortest side measures 6.5 inches and cut two pocket pieces.
I used fusible interfacing on my bag outer and pocket pieces, but in hindsight I should have used fusible fleece. I love the fusible fleece from Pellon and definitely recommend it. Here’s the link if you want to check it out. It’s an affiliate, so anything purchased through it goes to help support future Whitney Sews tutorials.
After the pieces are cut and fused you are ready to start sewing following my step by step tutorial. Click HERE to watch!
What kinds of zipper bags do you like to make and want more tutorials on?? I love bags with boxed bottoms so they stand up on their own and hold more items. Well, that’s it for today. Until next time, Happy Sewing!
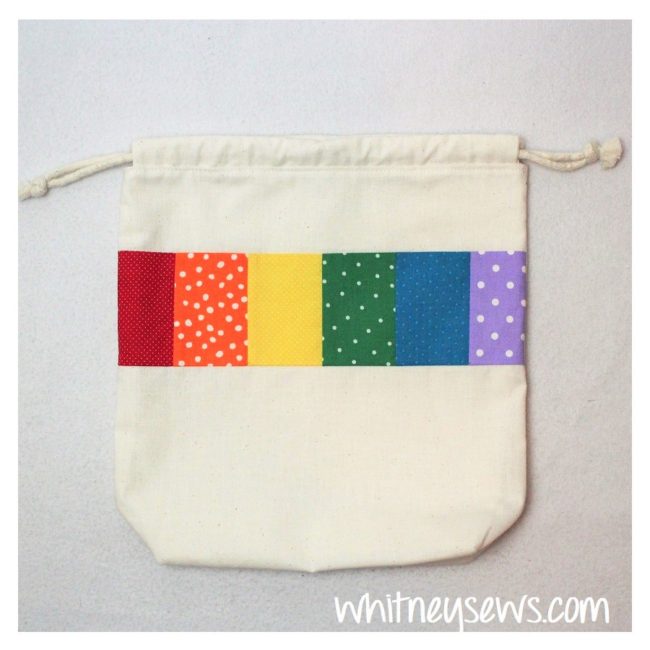
If you’ve been around Whitney Sews a while you know I LOVE things in color order! I’ve already passed this love on to my kids and we have a rainbow colors song we like to sing. This week I was inspired by my polka dot fabrics to make a Rainbow Drawstring Bag and I couldn’t be happier with how it turned out!
I wanted the rainbow strip to stand out as much as possible so I selected a very neutral fabric for the rest of the bag and the drawstring. I believe the fabric is a natural (unbleached) muslin, but to be honest it was given to me so I’m not completely certain.
The bag is not hard to make (especially if you’ve followed any of my other drawstring bag tutorials). However there are a lot of measurements to keep track of, so I created a corresponding PDF to go along with the step-by-step video tutorial. Click HERE to get the PDF. The PDF will be free for the first couple of days, then will go back to it’s regular price. Make sure you are subscribed to Whitney Sews on youTube or on WhitneySews.com so you don’t miss out on these types of deals.
Anyway, enough chit chat! You can find the step by step Rainbow Drawstring Bag tutorial HERE!
Are there any specific bags you want to see a tutorial for on Whitney Sews?? If so leave me a comment and let me know.
That is all I have for this week, I’ll be back next Wednesday with another sewing how to. Until then, Happy Sewing!
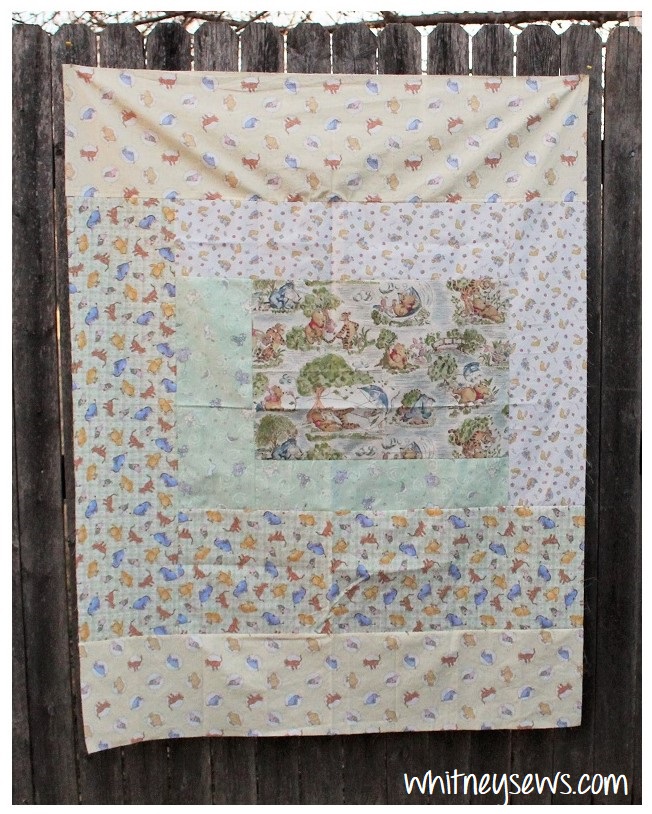
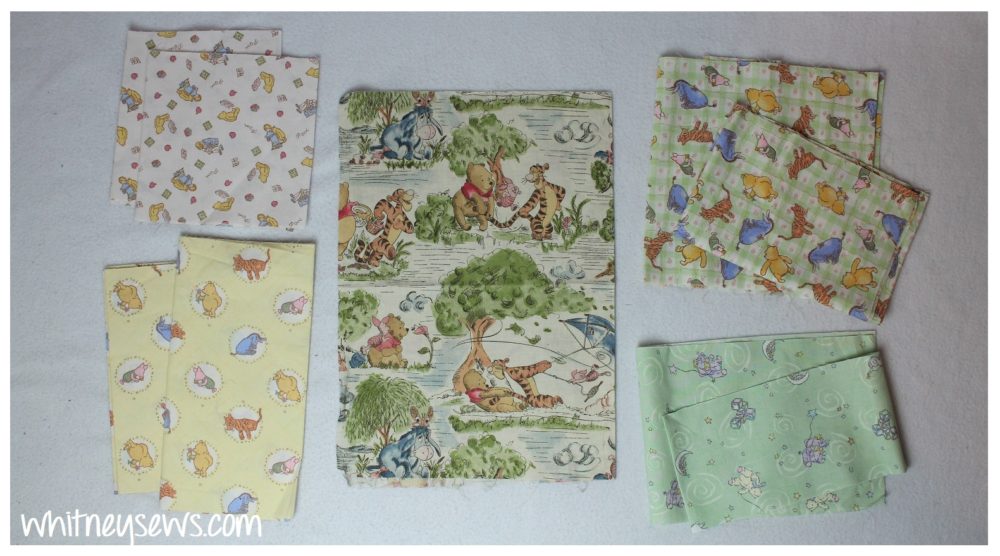
When I was pregnant with one of my daughters a kind viewer sent a box full of fabrics to me. There were five Winnie the Pooh fabrics in the box (along with lots of other goodies!). For a long time I couldn’t decide what to do with the fabrics. I wanted to use them all for one project and be able to show off all the prints. I finally came up with an idea for a quilt top that uses all the prints together to create one large block. This one block quilt top can be sewn together in about an hour.
The top may be super quick to sew together…but it took me a year and a half to get around to it. That’s right, I cut the fabrics for this quilt about a year and a half ago (during the first year of my Sew Your Stash challenge), but I didn’t have a large enough area to film a quilt tutorial. So I put it off and put it off. Then the second week we were in our new house I cleared off the floor and sewed my quilt together! Felt so good to finally check it off my to-do list!
My quilt design is based off a traditional log cabin quilt block (one of my favorite quilt blocks). The key to making it all work was playing with the scale of the prints – smallest next to largest, as well as colors so the block design can stand out. This allowed me to use all five prints without any solids or low volume prints to break up the design.
Because there are quite a few cutting measurements for the one block quilt I made a PDF to go along with this project. You can find it by clicking HERE.
Once you have the PDF click HERE to watch the step by step sewing tutorial.
So what do you think?? Do you like sewing one block quilt tops or do you prefer to create several blocks that are sewn together to make a pieced top? I like both because sometimes I feel like sewing lots of individual blocks and including many different fabrics and other times I just want to whip up a quick project.
I’ll be back next week with another new tutorial. Until then, Happy Sewing!
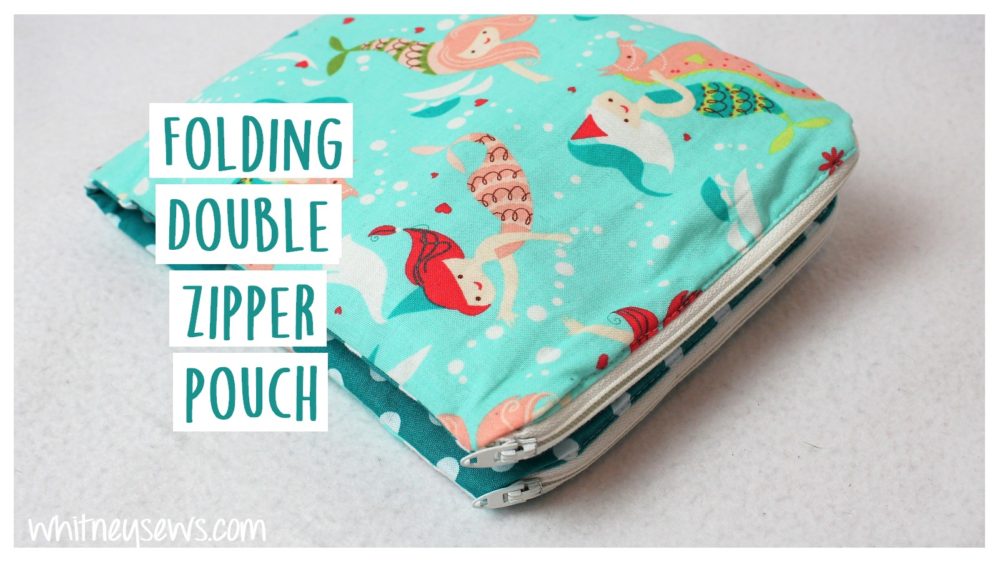
Last week I mentioned dreaming up a unique zipper bag while laying in bed too sick to sew. As soon as I felt better I tested out my project idea and it turned out EXACTLY how I wanted! The bag is a long double zipper pouch with a zipper on each end and stitching lines in the center to divide it into two separate lined pockets. It folds over and snaps into a nice, compact size. Anyway, enough talk, let’s get into this double zipper foldover bag tutorial.
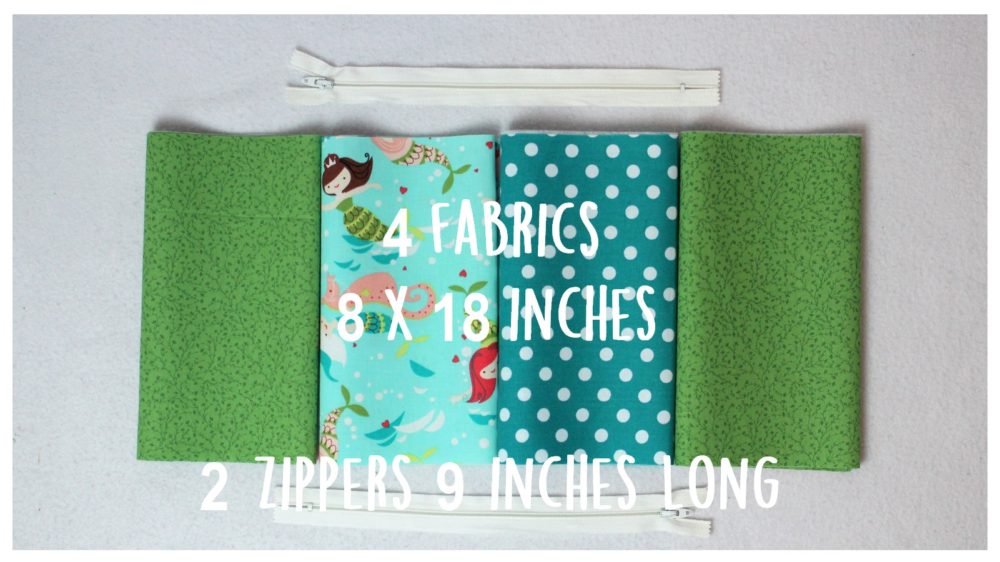
For this project you will need 4 pieces of fabric – 2 for the lining and 2 for the outer. I used different fabrics for each of my outer pieces for a little bit of visual interest, but you can use matching fabrics if you prefer. When I was first picturing this bag I thought I would keep it for myself. But I ended up picking an adorable mermaid print and other bright fabrics from my stash that my kids love. So it seems this bag is destined to become a busy bag of sorts for my kids. Really it works out perfectly because I can tuck activities for Peyton in one side and activities for Skyler in the other side. Then it can be tucked into a backpack or tote bag for some on the go activities to keep the kiddos occupied.
You’ll notice the zippers are longer than the width of the fabric. This is on purpose and important. The zippers need to be at least one inch longer than the fabric width because they will need to be unzipped to keep the excess material out of the way while top stitching certain parts. The wider you can open the piece up at that point the better.
You can find the entire step by step sewing tutorial HERE!
This is probably one of the most in depth (I want to say complicated, but it’s really not hard, just lots of steps) zipper bag tutorials I’ve shared on my channel. But I had such a blast making it and really hope you will give it a try! Let me know if you want to see more tutorials like this one on my channel. You can find some of my previous zipper bag tutorials HERE.
That is all I have for this week, I’ll be back next Wednesday with another sewing how to. Until then, Happy Sewing!
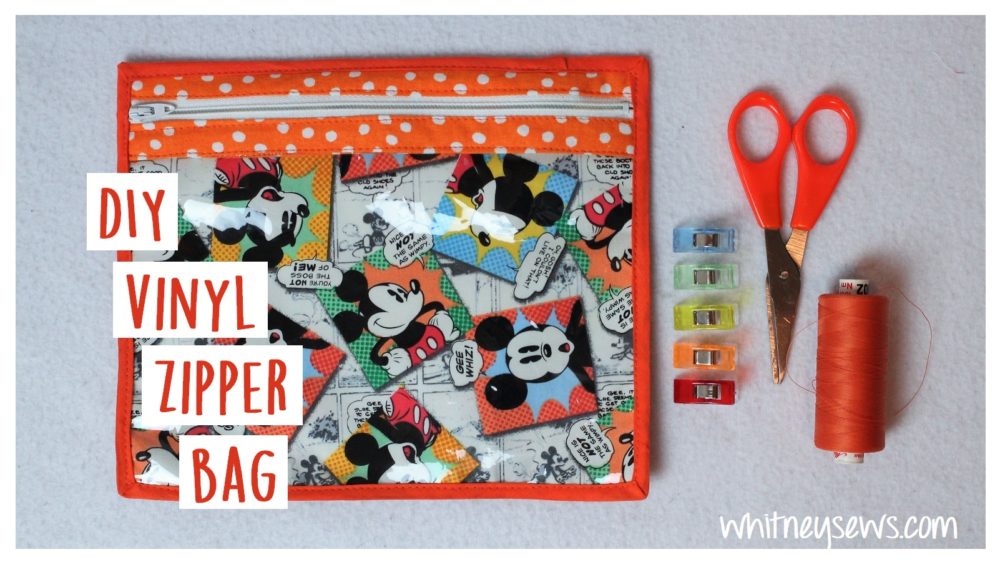
Last week I got sick…Bleh! It was the kind of sick that leaves you with 0 energy. I spent 2 days straight in bed, exhausted and coughing. While I was in bed I had plenty of time to think about sewing (since I couldn’t actually sew). I came up with a really unique bag project that I hope to share in the next few weeks and as soon as I was well enough to sew I filmed this week’s tutorial. It is a zipper bag featuring a vinyl window in the front so you can see exactly what is inside the bag. The vinyl zipper bag is fully finished inside and out so it will last a very long time.
Years ago I picked up a remnant of vinyl fabric. For a very long time I was too intimidated to sew with it. I hated using vinyl because it sticks to my machine, slides around while I’m sewing, and never seems to end up how I want it. But I realized I will never get better at working with vinyl if I don’t actually use it!
I guess what I’m saying is I am by no means an expert when it comes to sewing vinyl. I struggle just as much as anyone else, but this tutorial is about the project…which is a really great zipper bag! My cheat for making sure the bag turns out, despite any sewing struggles, is to cut the vinyl larger than the desired finished size. Then I trim it down to size before adding the binding in the last step.
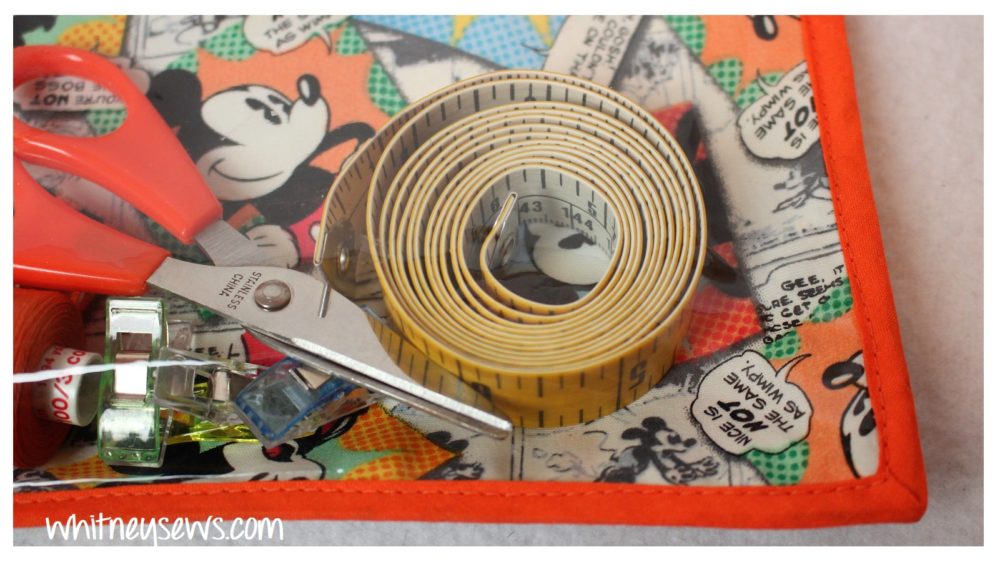
The one tip I do have to share pertains to cutting the vinyl. I’ve tried cutting it with a gridded acrylic ruler and a rotary cutter, but it is too hard to see the vinyl under the ruler and make sure I’m cutting it to the exact right size. So instead I use a permanent marker to mark out the lines I need to cut on. Then I can see I have the measurements right and the lines are easy to see under the ruler as I cut with a rotary cutter. You can find my favorite rulers and rotary cutter HERE on my Amazon page. Anything purchased through that link helps me earn a small percentage to fund future Whitney Sews tutorials.
Anyway, let’s get on with the actually tutorial. As I mentioned earlier, I was just getting over being sick and ended up cutting one of my pieces the wrong size. I realized it way too late to recut it, but thankfully I have copied all the measurements down CORRECTLY for you all!
After your pieces are cut you are ready to start sewing! Follow the step by step tutorial HERE!
I would love to know if you like working with vinyl or if you’re like me and still need a lot of practice. If you make this or any other project using my tutorials I would love for you to share a pic on the Whitney Sews Facebook page or on instagram using #WhitneySews
I’ll be back next week with another new tutorial! Until then, Happy Sewing!


