Sewing on a budget is a necessity for many sewers, but it doesn’t have to feel like a punishment! Today I want to share some of my favorite methods for making costumes on a tight budget and enjoying it.
I began sewing 22 years ago. My very first big project was a scrappy quilt using leftover pieces from my mom’s quilt project. Her fabric – thrifted plaid shirts. It was the ultimate budget project and we had a blast working on our quilts!
The first garments I made were t-shirt reconstructions. My materials – a boyfriend’s old, unwanted t-shirts.
Early in our marriage all my projects were made from thrifted sheets. I could get them for a dollar or two and make a ton of things from each one.
It dawned on me a few years back that having limited supplies forced me to be more creative. I could be creative with material choices, cutting layouts, and mixing fabrics. I loved the challenge of making so little add up to look like so much more.
So, how do you get started costuming on a budget? Below are some of my favorite tips.
Use Your Stash
I start each project at the stor(age). Yes, that is correct, do not start by heading to a store, but rather to your storage (or stash). In my case that is a storage building in our yard. We keep Christmas decor, out of season clothes, and my extra fabric in there. When I’m planning a new project (or trying to decide between a couple of projects) I will head out there with my reference photos and see what I can find. Sometimes it’s a fabric for the majority of the costume other times it’s just a trim or a sheet to use for the lining. The more materials I can use from my stash, the less I need to buy.
Stock Up on Basics
You may be thinking, but I don’t have much of a stash. So my next tip is to stock up on basics. When there is a great sale stock up on things you know you use time and again. Things like thread, interfacing, and elastic are some of my must haves on hand. Years ago I bought interfacing a yard or two at a time as needed. This meant a trip to town, possibly paying full prices, and small bits of offcuts left over each time. I realized how ridiculous this was after a while. The next time interfacing was 60% off I bought an entire bolt. Now there is less waste because I’m working with one continuous piece, I got it at the lowest possible price, and it’s always on hand for planned or unplanned projects.
Thrift Wisely
After checking my stash and my go to supplies I hit the thrift stores. I have a handful of good thrift stores in my area. I hit up each one to see if I can find curtains, sheets, yardage, and even clothing that can be repurposed. I will go to stores with specific projects in mind, but will also pick up any curtains and things I find that could work for other projects in the future. I gravitate to natural fibers when possible (linen and cotton) and texture. Texture adds visual interest and makes a costume look more expensive.
The skirt in the photo below was made from a circle tablecloth I thrifted for $2. It has a tone on tone damask design that looks much more interesting than a solid yellow fabric. The waistband was made from a thrifted bed skirt and some stash elastic.
Think Outside the Box
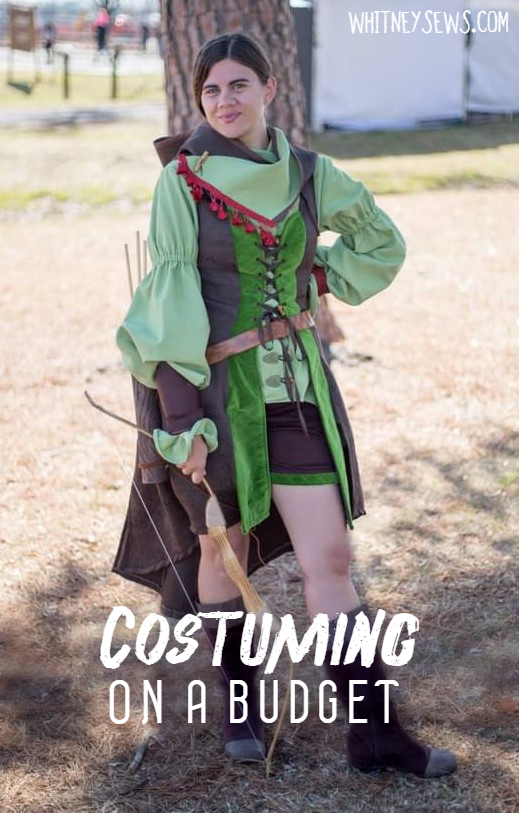
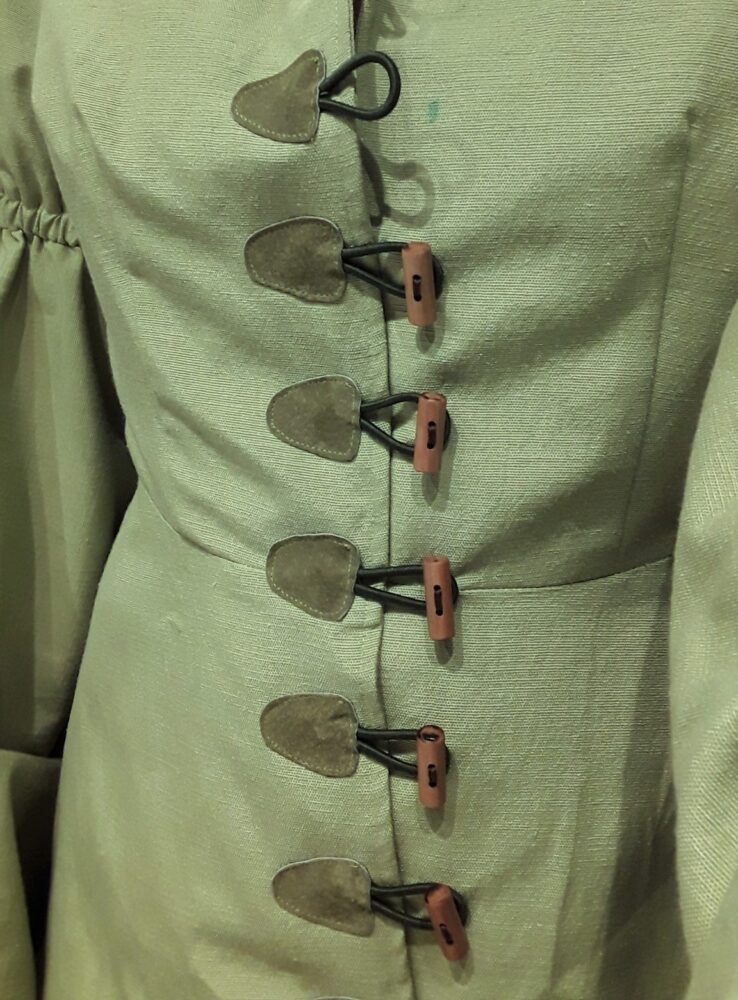
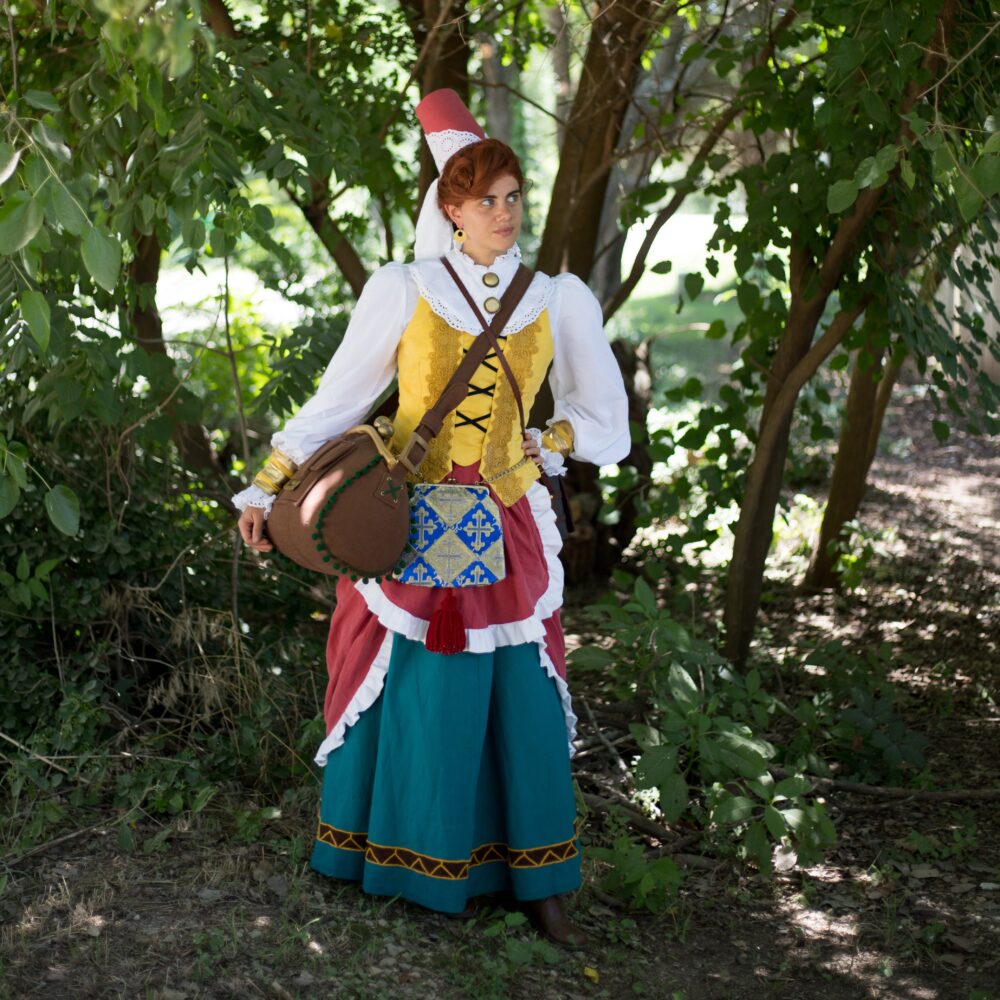
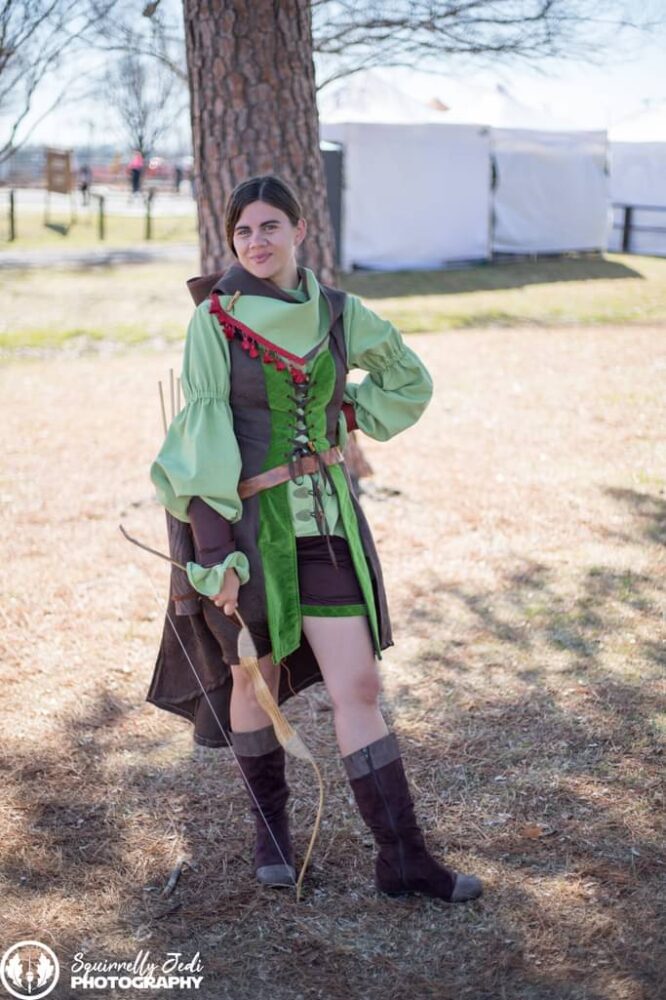
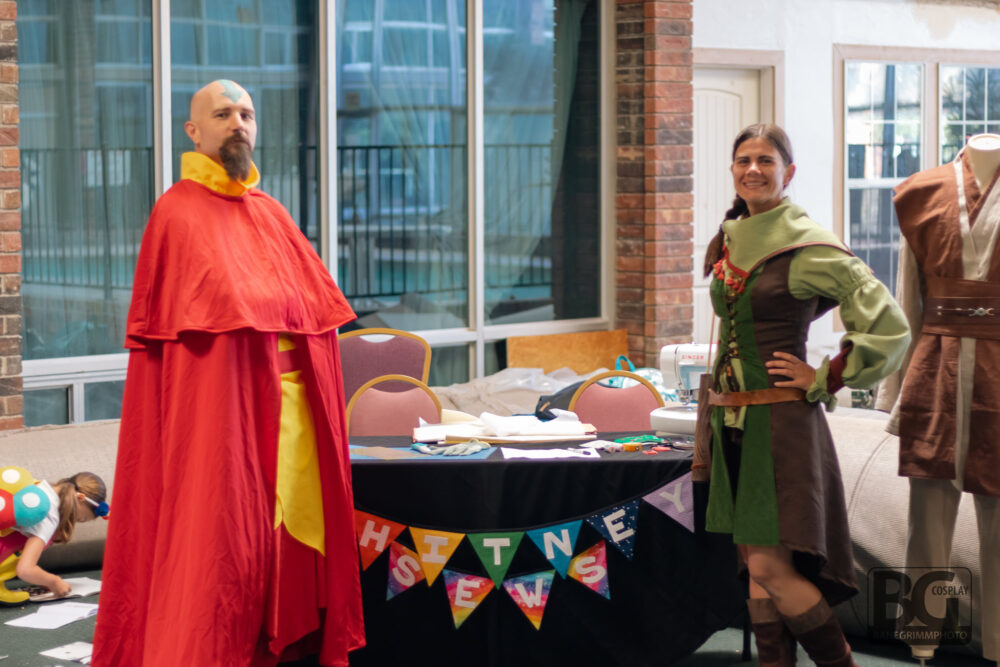
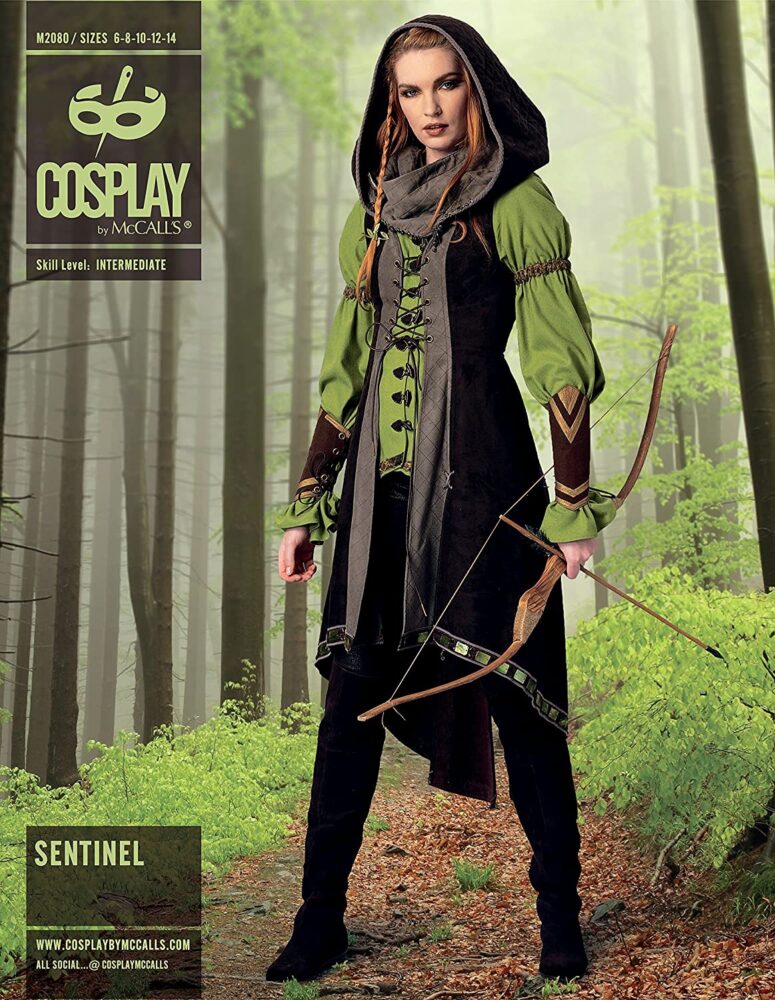
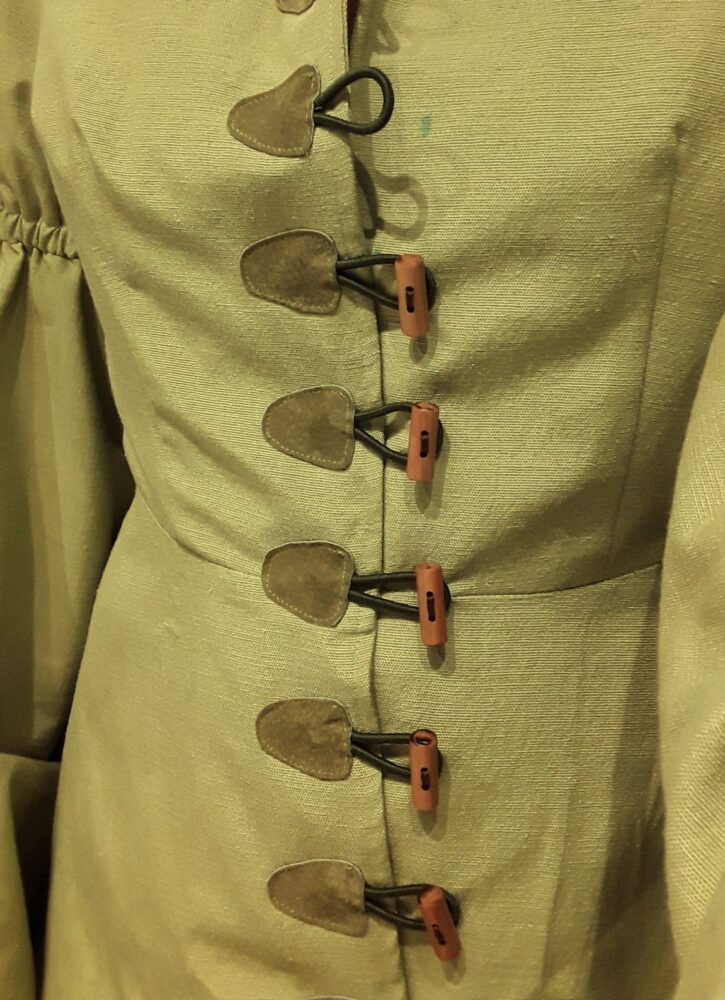
After I nail down as many materials as I can from stash and thrift stores I look at the items that are left. These are usually non fabric items. In the case of my female Robin Hood costume I needed eight toggle buttons and loop fasteners. It was not in my budget to buy them, so I figured out how to make them – for free! The buttons are a dowel rod from a broken clothes drying rack I had hung onto “just in case”. I cut, dremeled, stained and sealed them to have beautiful wooden buttons. The loop fasteners are scrap leather from a jacket I thrifted and used in THIS project years ago and green elastic cord from another thrift flip. My lack of budget challenged me to try new things and I gained some new skills.
BTW take note of the texture of the green fabric. As I mentioned earlier, texture adds a lot to a costume. Since making this shirt I have managed to thrift the same curtain in black, raspberry, and cream to use in future projects.
Reuse Costume Pieces
My most recent finish was a huge build with a big (for me) budget of time and money. It took about 200 hours to complete, 50+ of those hours were spent hand embroidering the bottom of the teal skirt. The costume won Best in Show at the largest convention in our state, so I probably won’t be competing with it anymore. Plus the costume has SOOOOO many pieces that I realistically don’t see myself wearing it that many times. But that doesn’t mean I can’t reuse parts of it.
I have been wanting to make a costume from the movie Brave for many years. So when one of the kids looked at the teal skirt and said “it looks like something Merida would wear” I knew it had to happen. I had about 1 yard of the material left and managed to squeeze a bodice and sleeves out of it. This coming weekend I’ll be wearing the skirt with the new bodice and a shirt I made from a thrifted sheet for a Merida costume. I’ll be sharing photos on my Instagram, so make sure you’re following me to see them.
I’m also already planning to reuse my $2 yellow tablecloth skirt in another upcoming cosplay. I didn’t intentionally pick costumes that could reuse pieces, but you definitely could to get the most bang for your buck by selecting costume with basics that can be used time and again!
Costume and Budget Breakdown
Whew, now that I have shared all those tips, I want to do a quick breakdown of my Robin Hood costume.
I started with the Cosplay by McCalls Sentinel pattern, I picked it up on sale for $1.99 a few years ago. The apple green shirt and hood lining was made from a thrifted curtain I pulled from my stash. The green velvet was a bit leftover from making THIS dress for Peyton to wear to the Medieval Fair when she was a baby. Before that the velvet was actually part of my mom’s stash. The red trim is from a theatre sale I went to years ago. I made the leather bracers from scraps I got in a bargain bag (with a coupon!) years ago at Hobby Lobby. The quiver is foam and paint I already had in my craft stash. The boots were repurposed from my Arrietty costume a few years back. The belt is Jeremiah’s and the bow and arrow were bought for a different costume. I mentioned earlier how I made the custom closures. The only two things I bought for this costume were the shorts for $2.50 (I added velvet at the bottom to make them longer and tie in better with the costume) and brown curtains for $10 for the body of the vest and hood outer. That means I made a new costume for under $15!
The biggest takeaway from this is don’t look at budgeting as something hard or punishing. Look at it as a way to kick start extra creativity, gain new skills, and be more sustainable. I won’t go super deep into sustainability right now, but I do love knowing that in addition to saving money I’m also cutting back on purchasing new fabrics and keeping existing materials from being thrown out.
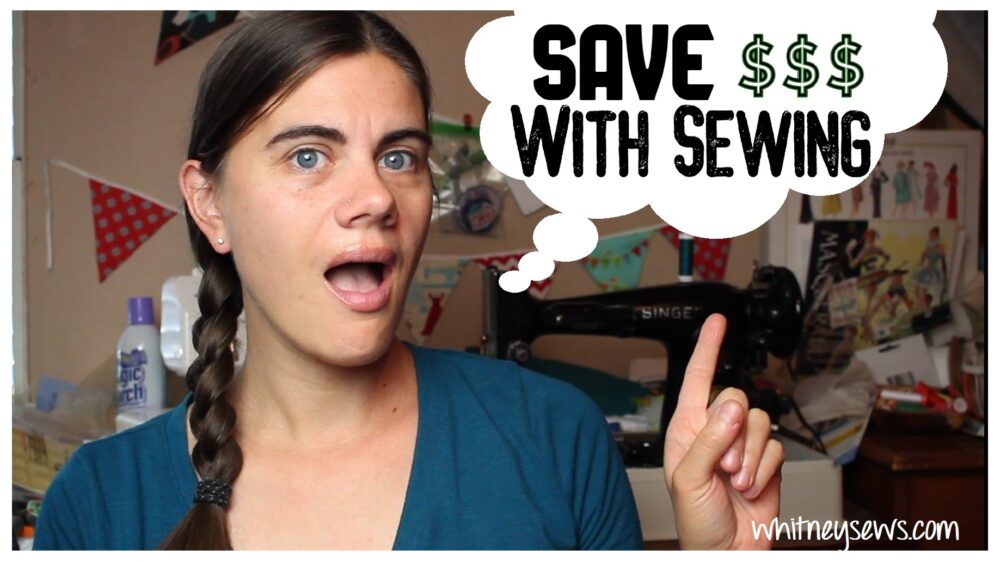
I have a video coming soon all about saving money with sewing. You won’t want to miss it, so make sure you’re subscribed to Whitney Sews on youTube to catch it. Until next time, Happy Sewing!
Whitney